Planning view VS Checklist view
Unlike the quotes section, the booking section
enable you to view the Program Details Tab in 2 different views:
Planning View: This option enables you to view the itinerary in a horizontal format (as is familiar in the quote section):
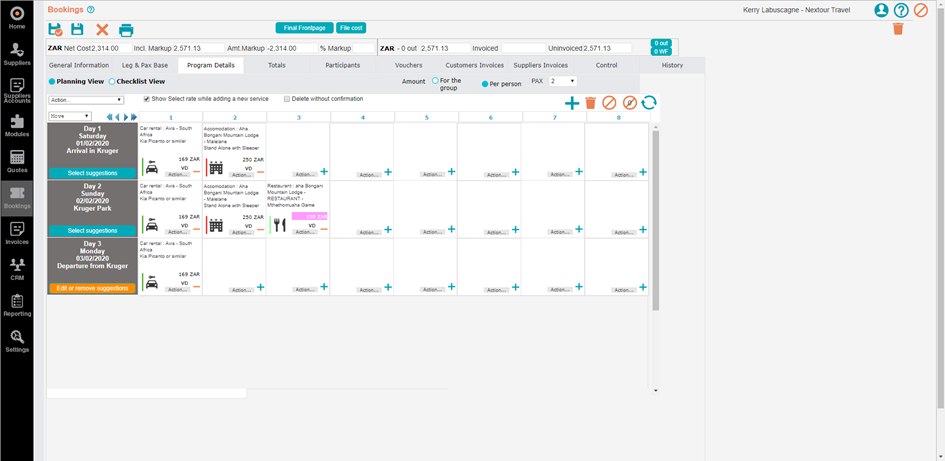
This view enables you to:
- Add day titles and WETU day descriptions.
- Add services.
- Delete services.
- Amend services.
- Include suggestions.
Checklist View: This option enables you to view the itinerary in a vertical format:
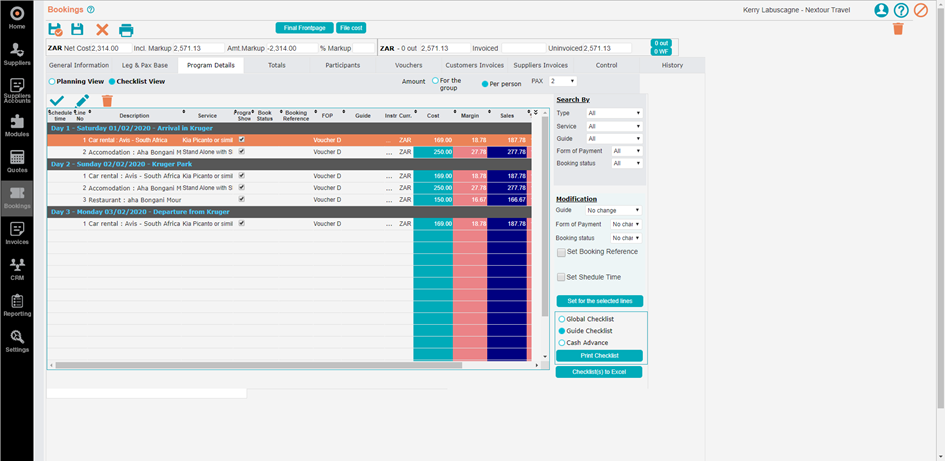
This view enables you to:
- Add services.
- Delete services.
- Amend services.
The Checklist View also includes a window on the right-hand side of the screen which allows you to filter services. As well as additional functions to set booking statuses, insert booking reference numbers, and print a guide checklist and guide cash advance.
Planning View: This option enables you to view the itinerary in a horizontal format (as is familiar in the quote section):
This view enables you to:
- Add day titles and WETU day descriptions.
- Add services.
- Delete services.
- Amend services.
- Include suggestions.
Checklist View: This option enables you to view the itinerary in a vertical format:
This view enables you to:
- Add services.
- Delete services.
- Amend services.
The Checklist View also includes a window on the right-hand side of the screen which allows you to filter services. As well as additional functions to set booking statuses, insert booking reference numbers, and print a guide checklist and guide cash advance.
Related Articles
How to create a guide checklist & cash advance
Under the “Program Details” Tab, select the Checklist View and then chose the services/costs that need to be linked to the guide. You are also able to select the services using the filters in the “Search By” block on the right-hand side of the page: ...How to view rates
Select the « Suppliers icon » Select « Database » In the database, use the filters for researching suppliers. Once you have found the desired supplier, to check rates, click on the “Edit service” function to access rates and details: The ...How to view Supplier’s details (inside profile)
Hover over the “Suppliers” icon and select “Database”. Use the filters to search for the required Supplier. Once you have found the desired supplier, click on the “Edit service” button to open the Supplier’s service. This can be done by either ...Viewing scheduled payments
This function allows you to view the payments due to be made per suppliers, by payment date. The report renders as an excel document. Select “Suppliers Accounts” from the navigation bar on the left-hand side of the screen. Select the “Payments” ...How to view an existing customer
Select the “CRM” Tab on the left-hand side of the screen. The left-hand side of the screen show a list of the current customers. The right-hand side of the screen shows the details of the specific customer. Type the name of the customer in the ...