How to load customer payments
From the home screen, hover over the “Invoices” icon and select “Customer
Payment”.

A new window will open showing a list of all previous client payments that have been received:
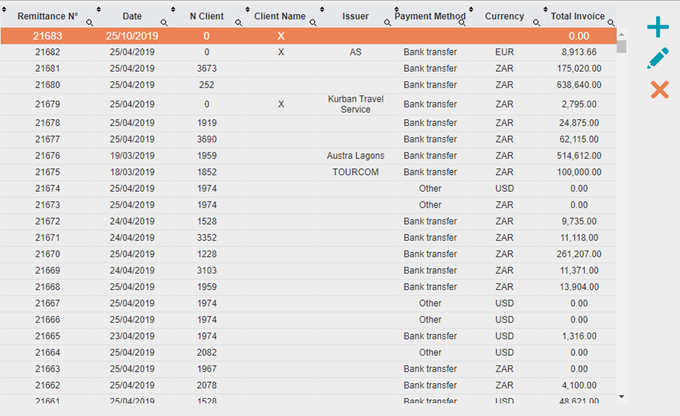
Click “Add”.
When the new window opens, click the 3 coloured dots to select the appropriate client:
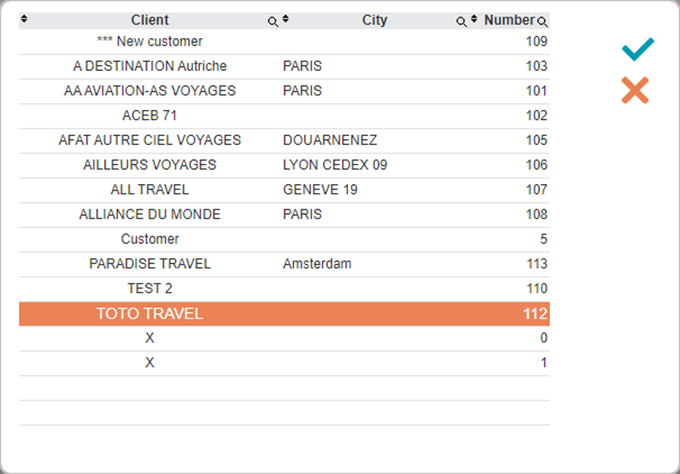
Once selected, complete the following information:
- Bank Reference
- Payment Method
- Bank Account
- Currency
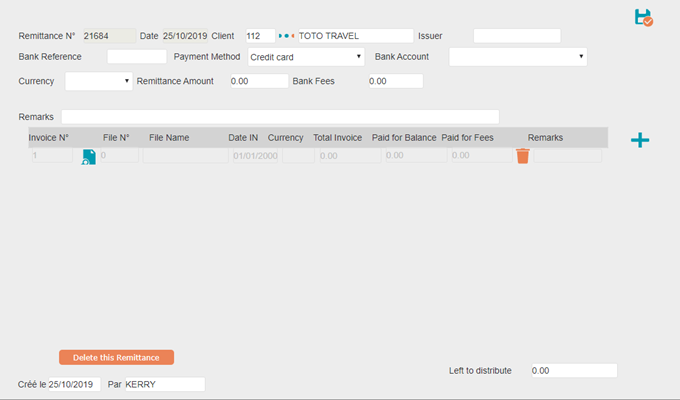
As soon as you select the Currency, the bottom line will activate and turn lighter. Click on the “Find Invoice” button. This will bring up a list of all bookings with outstanding payments due for the specific client selected:
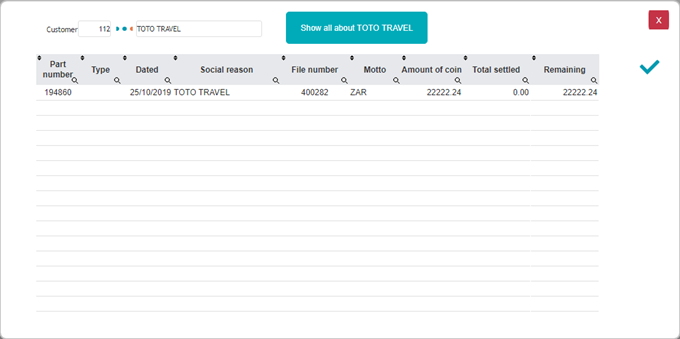
Highlight the appropriate invoice and click “OK”.
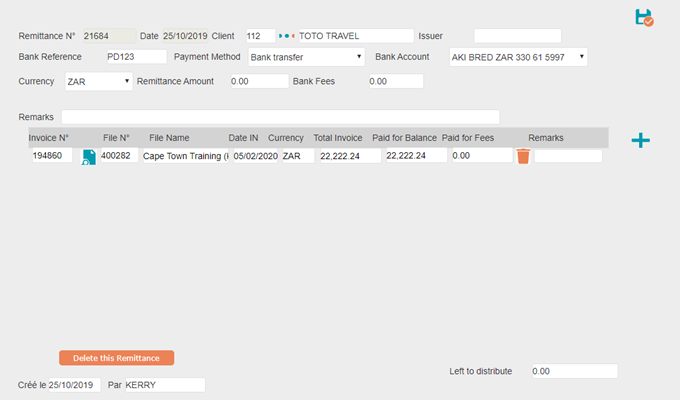
Insert the amount paid in the block labelled “Remittance Amount”. The “Left to distribute” block will now reflect this amount.
Copy this amount into the block labelled “Paid for Fees”. The “Left to distribute” block will now reflect a 0 amount.
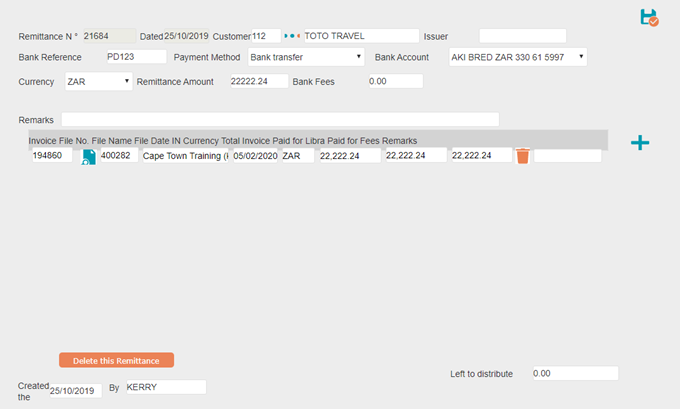
Click “Save & Close”.
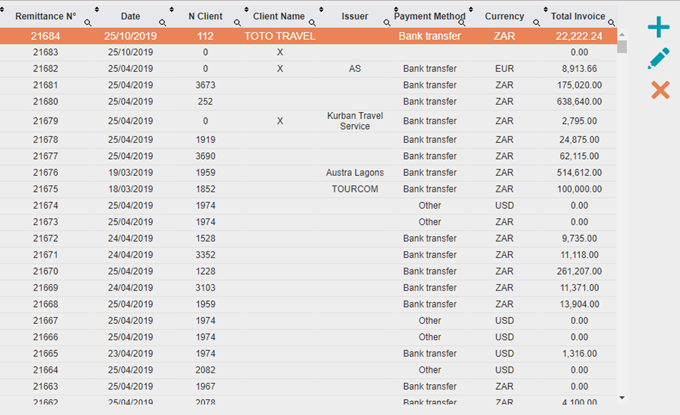
The entry is now reflected at the very top of the list:
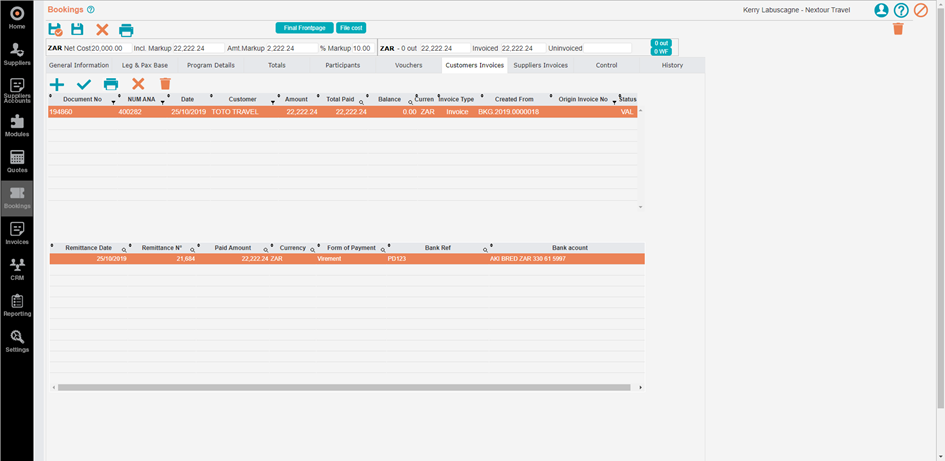
To check that the payment was captured correctly, go back into your booking and click on the “Customer Invoices” Tab. The payment will be reflecting underneath the invoice:
A new window will open showing a list of all previous client payments that have been received:
Click “Add”.
When the new window opens, click the 3 coloured dots to select the appropriate client:
Once selected, complete the following information:
- Bank Reference
- Payment Method
- Bank Account
- Currency
As soon as you select the Currency, the bottom line will activate and turn lighter. Click on the “Find Invoice” button. This will bring up a list of all bookings with outstanding payments due for the specific client selected:
Highlight the appropriate invoice and click “OK”.
Insert the amount paid in the block labelled “Remittance Amount”. The “Left to distribute” block will now reflect this amount.
Copy this amount into the block labelled “Paid for Fees”. The “Left to distribute” block will now reflect a 0 amount.
Click “Save & Close”.
The entry is now reflected at the very top of the list:
To check that the payment was captured correctly, go back into your booking and click on the “Customer Invoices” Tab. The payment will be reflecting underneath the invoice:
Related Articles
Updating booking statuses & forms of payment
Once confirmations have been received from the suppliers, the booking status of each service needs to be updated. This helps you keep track of each service, create vouchers, and to create a guide cash advance. Once the booking statuses have been ...Viewing scheduled payments
This function allows you to view the payments due to be made per suppliers, by payment date. The report renders as an excel document. Select “Suppliers Accounts” from the navigation bar on the left-hand side of the screen. Select the “Payments” ...Capturing Supplier's payments
Select “Suppliers Accounts” from the navigation bar on the left-hand side of the screen. Select the “Payments” function on the right-hand side of the screen. Click “New Payment”: In the new window, click on the 3 coloured dots and search for the ...How to create a new customer
Once you have performed a very thorough search to make sure the customer isn’t loaded, click on the “New” button. A blank template will open as follows: Complete the information as necessary on all of the tabs and click “Save”. The new customer will ...How to load a supplier on Nextour
PURPOSE: The purpose is to load a specific supplier including the following information: - Supplier name(s) & Contact details - Rates - Information - Negotiated Contract - Internal notes LOADING A SUPPLIER: **NB! Before creating a New Supplier, make ...