How to build a module
Select the “Modules” Tab from the menu on the
left-hand side of the screen.
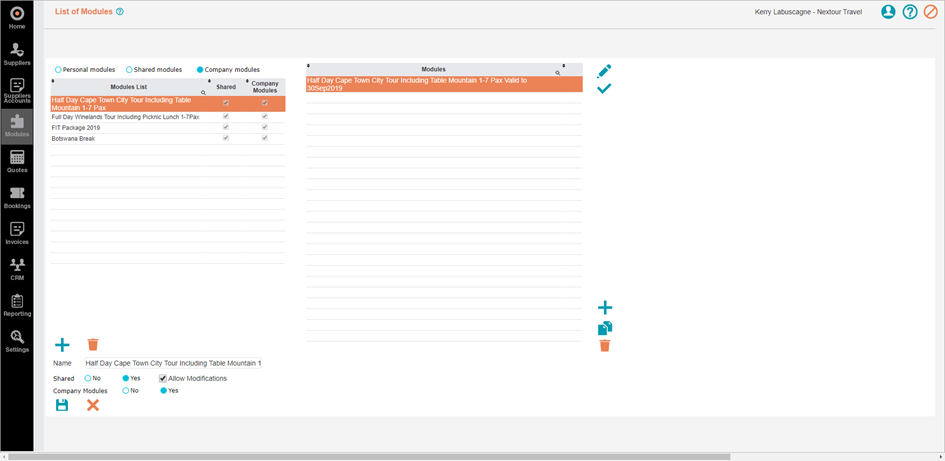
Personal modules: Modules exclusively for your own use.
Shared modules: Lets you share the module with other consultants.
Company modules: Standardised modules used for online purpose only.
Select “Modules” from the navigation bar on the left-hand side of the screen. Click on the “New” button at the bottom of the left-hand side of the screen to create a new module:

Name your new module and select the appropriate boxes:
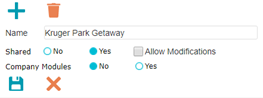
Click “Save”. Your new blank module now appears in the appropriate list:
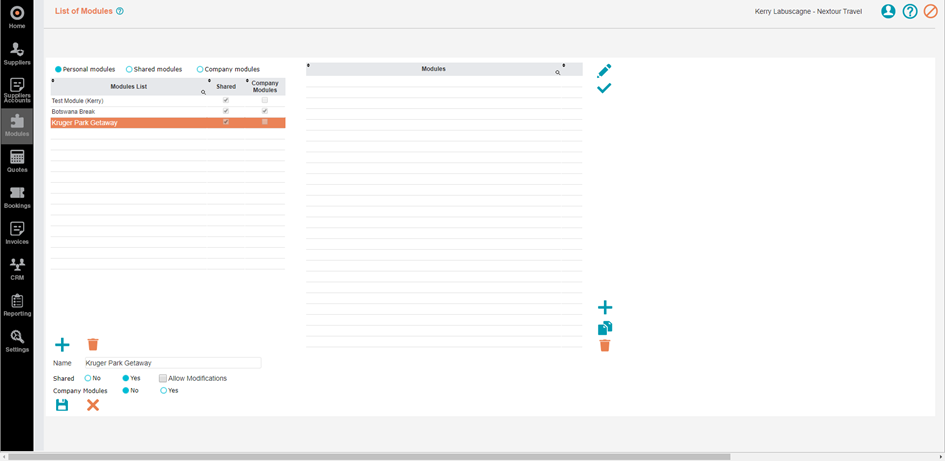
The left-hand side of the screen shows a list of all modules. The right-hand side of the screen shows the details. For now, this is blank until you add more information into the new module.
Click on the “New” button at the bottom of the left-hand side of the screen to load the information into your new module:

A new window will open for you to complete the necessary information needed for your new module:
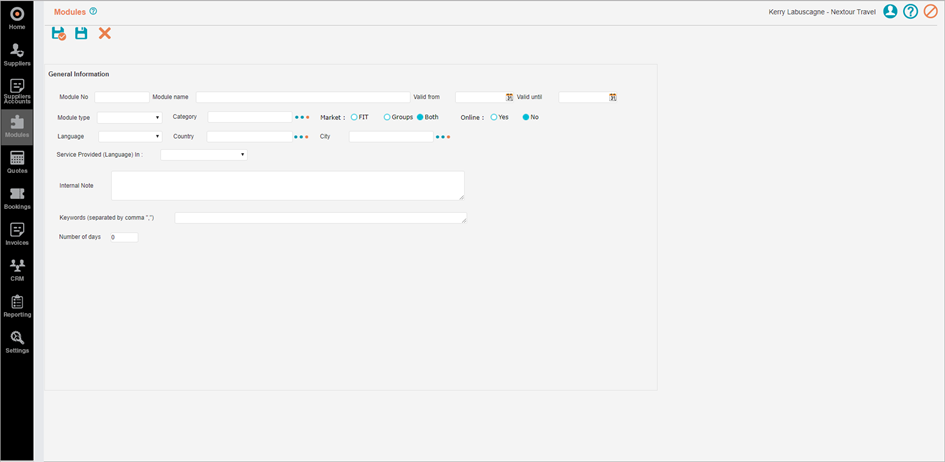
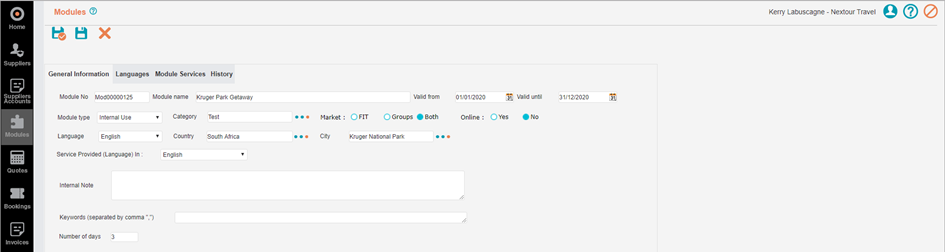
Complete all the required fields:
Module No: Leave this out – it will automatically fill in when you save the information.
Module name: The name of your module. Try to make this as specific and to the point as possible for easy reference.
Valid from and Valid until: The validity period the module will be available.
Module type: Either “Excursion” for a day tour, or “Internal” if more than 1 day.
Category: Allows you to arrange like modules into groups of similar types.
Market: Groups or FIT or both.
Language: Language in which the service is provided.
Country: The country in which the module is based.
City: The city in which the module is based. If the module is built over several cities, select the city in which the module starts.
Service Provided (Language) In: Language in which the service is provided.
Internal Note: Any special or important notes you would like to reiterate internally about the module.
Keywords (separated by comma ","): Create keywords that you will type when searching for the module.
Number of days: Duration of the module.
Once all the fields have been completed, click “Save”. You will notice that 3 new Tabs have been created.
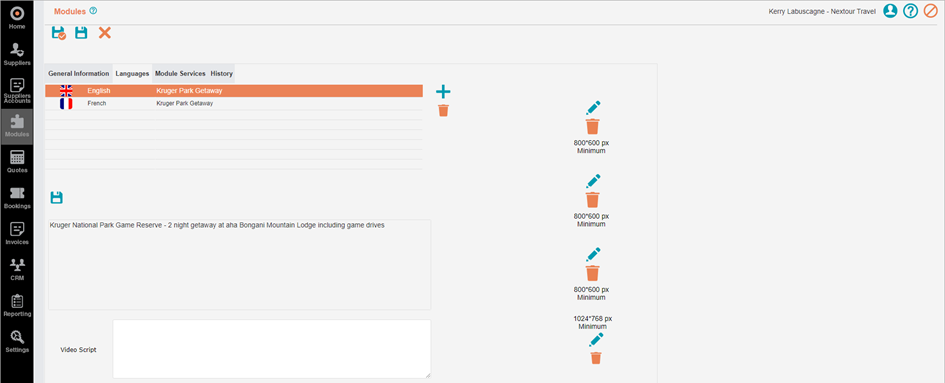
Select the “Languages” Tab.
Complete the description / overview and click “Save”.
You are able to add additional languages in by clicking the “New” button. Nextour will then ask if you want to add a blank option, or an option with the same information as loaded previously.
Photos and videos can also be inserted in the appropriate blocks.
Select the “Module Services” Tab.
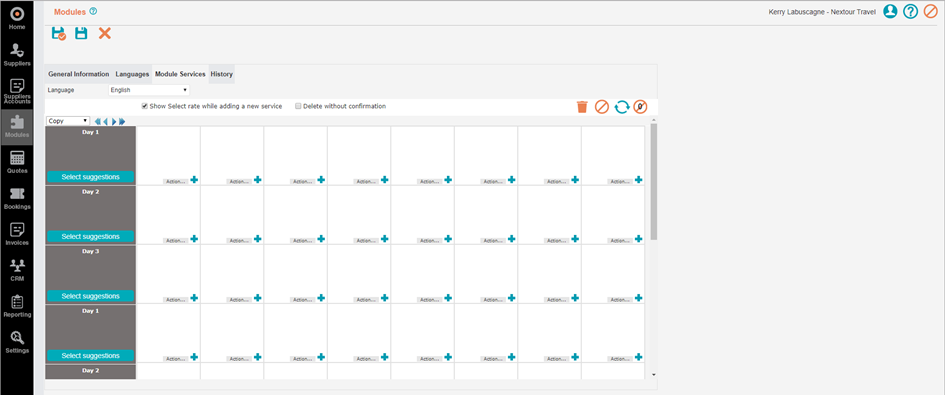
A blank programme is now shown for you to add the necessary services.
*Please note: only the ‘costs’ will reflect.
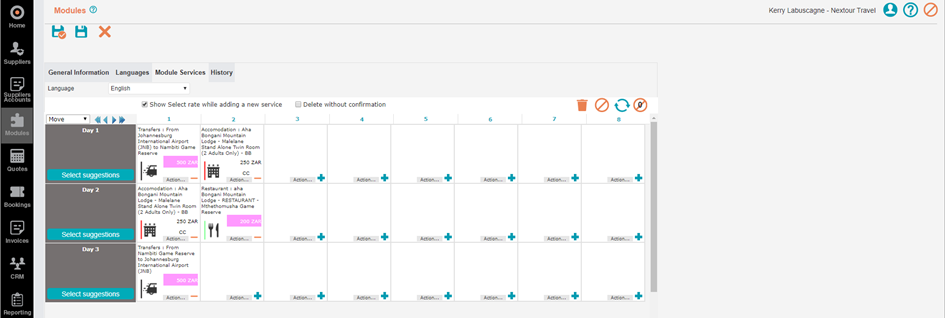
Once you have finished adding the necessary services, click “Save & Close”.
Personal modules: Modules exclusively for your own use.
Shared modules: Lets you share the module with other consultants.
Company modules: Standardised modules used for online purpose only.
Select “Modules” from the navigation bar on the left-hand side of the screen. Click on the “New” button at the bottom of the left-hand side of the screen to create a new module:
Name your new module and select the appropriate boxes:
Click “Save”. Your new blank module now appears in the appropriate list:
The left-hand side of the screen shows a list of all modules. The right-hand side of the screen shows the details. For now, this is blank until you add more information into the new module.
Click on the “New” button at the bottom of the left-hand side of the screen to load the information into your new module:
A new window will open for you to complete the necessary information needed for your new module:
Complete all the required fields:
Module No: Leave this out – it will automatically fill in when you save the information.
Module name: The name of your module. Try to make this as specific and to the point as possible for easy reference.
Valid from and Valid until: The validity period the module will be available.
Module type: Either “Excursion” for a day tour, or “Internal” if more than 1 day.
Category: Allows you to arrange like modules into groups of similar types.
Market: Groups or FIT or both.
Language: Language in which the service is provided.
Country: The country in which the module is based.
City: The city in which the module is based. If the module is built over several cities, select the city in which the module starts.
Service Provided (Language) In: Language in which the service is provided.
Internal Note: Any special or important notes you would like to reiterate internally about the module.
Keywords (separated by comma ","): Create keywords that you will type when searching for the module.
Number of days: Duration of the module.
Once all the fields have been completed, click “Save”. You will notice that 3 new Tabs have been created.
Select the “Languages” Tab.
Complete the description / overview and click “Save”.
You are able to add additional languages in by clicking the “New” button. Nextour will then ask if you want to add a blank option, or an option with the same information as loaded previously.
Photos and videos can also be inserted in the appropriate blocks.
Select the “Module Services” Tab.
A blank programme is now shown for you to add the necessary services.
*Please note: only the ‘costs’ will reflect.
Once you have finished adding the necessary services, click “Save & Close”.